So you’ve joined the electric vehicle revolution—congratulations! Now comes the question every new EV owner asks: “How do I set up charging at home?” Installing a home EV charger might sound intimidating, but here’s the good news: it’s more straightforward than you might think, and the convenience is absolutely worth it.
In this guide, I’ll walk you through everything you need to know about installing a home EV charger, from choosing the right equipment to understanding costs and deciding whether to DIY or hire a professional. By the end, you’ll know exactly what steps to take to wake up every morning with a fully charged car in your driveway.
What you’ll learn:
- The different types of home chargers and which one you need
- Step-by-step installation requirements and process
- Real costs you can expect (spoiler: it varies widely)
- Whether you should hire an electrician or tackle it yourself
- Permits, inspections, and available rebates
- Common mistakes to avoid
Let’s dive in and get you set up for hassle-free home charging.
Understanding Your Home Charging Options
Before you start drilling holes or calling electricians, you need to understand what you’re actually installing. Not all EV chargers are created equal, and choosing the right one makes all the difference.
Level 1 vs. Level 2: What’s the Difference?
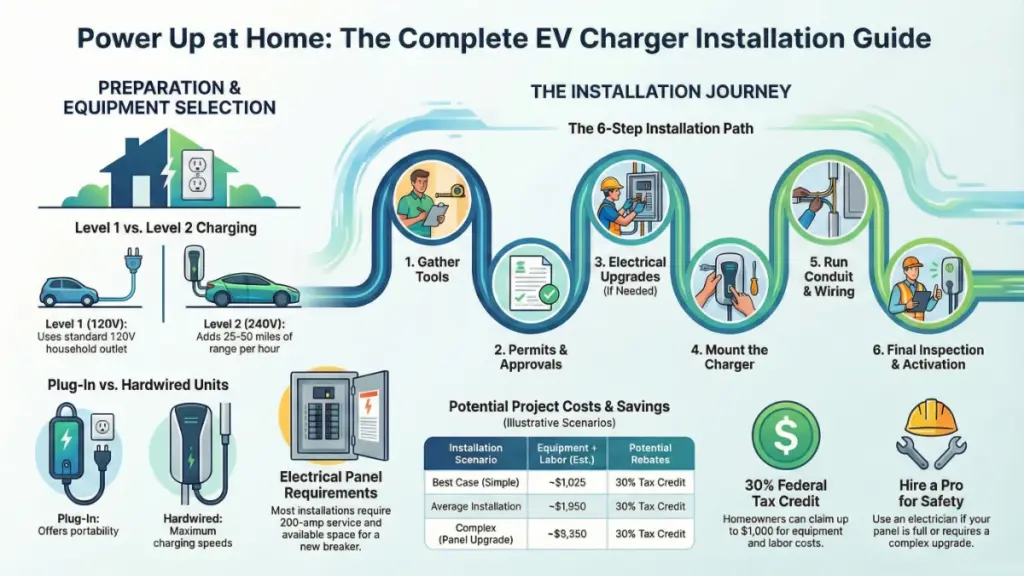
Level 1 Charging uses your standard 120-volt household outlet—the same one you plug your phone charger into. It’s the slowest option, adding only about 3-5 miles of range per hour. If you have a short commute and can charge overnight, this might work, but most EV owners quickly outgrow it.
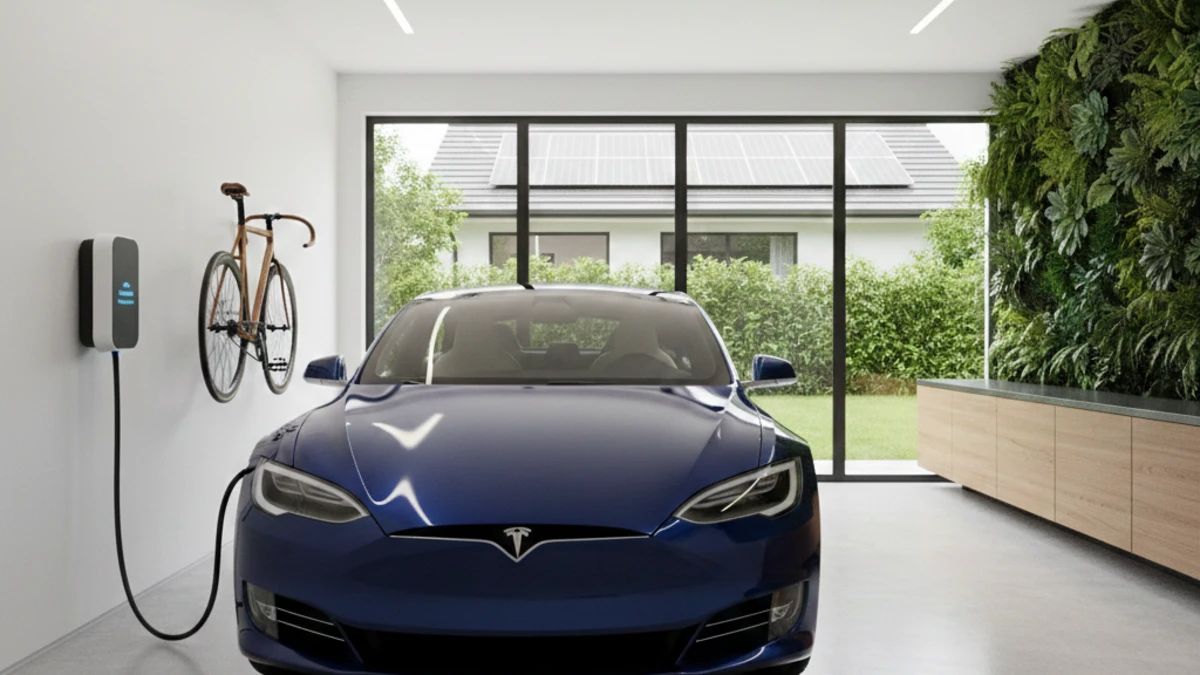
Level 2 Charging is what most people mean when they say “home EV charger.” These units run on 240 volts (like your dryer or oven) and deliver 25-50 miles of range per hour depending on the charger and your vehicle. This is the sweet spot for home installation—fast enough to fully charge overnight, even if you come home with a nearly empty battery.
Think of it this way: Level 1 is like filling a swimming pool with a garden hose, while Level 2 is like using a fire hose. Both get the job done, but one finishes before you retire.
Hardwired vs. Plug-In Chargers
You’ve got two installation options:
Hardwired chargers connect directly to your electrical panel with no plug. They’re permanently installed and often required if you want the maximum charging speed (up to 80 amps). The downside? Less flexibility if you move or want to take the charger with you.
Plug-in chargers use a NEMA 14-50 outlet (the same type as your electric dryer). They’re easier to install, portable if you move, and work great for most home charging needs. Most plug-in units max out at 40-50 amps, which is more than sufficient for overnight charging.
My recommendation? For most homeowners, a plug-in Level 2 charger offers the best balance of performance, flexibility, and installation simplicity.
Popular Home Charger Options in 2025
Here’s a quick comparison of well-regarded chargers currently on the market:
| Charger Model | Type | Max Amps | Smart Features | Approximate Cost |
|---|---|---|---|---|
| ChargePoint Home Flex | Plug-in or Hardwired | 50A | WiFi, scheduling, app control | $699 |
| Tesla Wall Connector | Hardwired | 48A | Tesla app integration | $475 |
| Grizzl-E Classic | Plug-in or Hardwired | 40A | Basic, weather-resistant | $399 |
| JuiceBox 48 | Hardwired | 48A | WiFi, voice control, usage tracking | $629 |
| Emporia EV Charger | Plug-in or Hardwired | 48A | Energy monitoring, smart scheduling | $449 |
Don’t obsess over amp ratings—anything 32 amps or higher will charge your EV overnight. Focus instead on reliability, warranty, and features that matter to you like WiFi connectivity or energy monitoring.
Pre-Installation Planning: What You Need to Know
The difference between a smooth installation and a frustrating, expensive one often comes down to proper planning. Here’s what to assess before you buy anything.
Evaluate Your Electrical Panel
Your home’s electrical panel is the heart of this operation. Open it up (or have someone do it for you) and check these critical factors:
Panel capacity: Most modern homes have 200-amp service, which easily handles an EV charger. Older homes might have 100-amp or even 60-amp panels. You can usually find this number on the main breaker inside your panel.
Available breaker space: You’ll need at least one empty slot—two if you’re installing a 240-volt circuit. Some panels are completely full, requiring a sub-panel installation or panel upgrade.
Distance from panel to charging location: The farther your charger is from your electrical panel, the more you’ll pay for installation. Long wire runs require thicker gauge wire and more labor.
Here’s a reality check: If your panel is outdated, full, or undersized, you might be looking at a panel upgrade costing $1,500-$3,000 before you even install the charger. Not ideal, but it’s a one-time investment that increases your home’s value and safety.
Choose Your Charging Location Carefully
Where you park matters more than you think. Consider:
- Proximity to your electrical panel (shorter distance = lower cost)
- Where you actually park (don’t assume—measure your typical parking spot)
- Weather protection (most chargers are weatherproof, but a garage or covered area extends their life)
- Cord length (chargers come with 18-25 foot cables; measure to ensure you can reach your charge port comfortably)
- Future flexibility (might you get a second EV? Install in a spot that works for multiple vehicles)
I’ve seen people install chargers that looked perfect on paper but turned out to be awkward in daily use. Park your car where you normally would, and physically walk through plugging in before finalizing the location.
Check Local Codes and Permits
Here’s where things get bureaucratic, but it’s important. Most jurisdictions require:
- Building permit for electrical work (typically $50-$200)
- Electrical inspection after installation
- Compliance with National Electrical Code (NEC) 2024 requirements
Some areas also have specific requirements for EV charger installations, like dedicated circuits, GFCI protection, or disconnect switches. Call your local building department before you start—it’s a 10-minute phone call that can save you major headaches.
The good news? If you hire a licensed electrician, they typically handle permits and inspections for you.
The Installation Process: Step by Step
Now for the actual installation. Whether you’re doing this yourself or supervising a contractor, here’s exactly what happens.
Step 1: Gather Your Equipment and Tools
What you’ll need:
- Your EV charger unit
- Appropriate wire gauge (typically 6 AWG for 40-50 amp circuits, 8 AWG for 30-40 amp)
- Circuit breaker matching your charger’s requirements
- Conduit and fittings (if running wire outside or exposed)
- Wire connectors and electrical box
- NEMA 14-50 outlet (if using plug-in charger)
- Mounting hardware (usually included with charger)
Tools required:
- Voltage tester
- Wire strippers
- Screwdrivers (Phillips and flathead)
- Drill with appropriate bits
- Level
- Wire fish tape (for running wire through walls)
- Conduit bender (if needed)
If you don’t own most of these tools or feel uncomfortable working inside your electrical panel, this is your sign to hire a professional.
Step 2: Install the Circuit Breaker
Safety first: Turn off your main breaker before doing ANY work inside your electrical panel.
- Remove the panel cover
- Identify an available slot for your new breaker
- Install the appropriately sized breaker (typically 40-60 amps depending on your charger)
- Connect the wires according to code: hot wires to the breaker, neutral to the neutral bus, ground to the ground bus
This is the most dangerous part of the installation. If you’re not 100% confident in your electrical knowledge, please hire a licensed electrician. It’s simply not worth the risk.
Step 3: Run the Wiring
Route your electrical wire from the panel to your charging location:
For garage installations:
- If the charger is on the same wall as the panel, you might run wire through the wall studs
- For opposite walls, you’ll likely need to run conduit along the ceiling or exterior wall
- Use appropriate conduit for exposed areas (PVC for interior, metal for exterior or exposed locations)
For outdoor installations:
- Always use weatherproof conduit
- Bury underground conduit at least 18 inches deep (check local code)
- Use weatherproof boxes and fittings rated for outdoor use
Pro tip: Label your wire at both ends. Future you (or the next homeowner) will appreciate knowing what that circuit powers.
Step 4: Install the Outlet or Hardwire the Charger
For plug-in chargers:
- Mount a NEMA 14-50 outlet box at your chosen location
- Connect wires to the outlet: two hots, one neutral, one ground
- Secure the outlet in the box and attach the cover plate
- Double-check all connections are tight
For hardwired chargers:
- Mount the charger’s backplate to the wall (use anchors for drywall, lag bolts for studs)
- Run wires into the charger’s junction box
- Connect according to manufacturer instructions
- Secure all wire connections with proper connectors
- Attach the charger faceplate
Use a level during mounting—nothing screams “amateur installation” like a crooked charger on your garage wall.
Step 5: Testing and Inspection
Before you plug in your car:
- Turn the breaker back on at the panel
- Use a voltage tester to confirm proper voltage (should read ~240V)
- Test the GFCI function if your charger has one
- For smart chargers, connect to WiFi and verify communication
- Schedule your required electrical inspection
Most chargers have LED indicators showing power status. Green usually means you’re good to go; red or flashing lights indicate a problem. Check your manual.
Step 6: Final Setup and First Charge
Once you’ve passed inspection:
- Download your charger’s app if it has smart features
- Set up any scheduling features (many utilities offer cheaper overnight rates)
- Plug in your EV and initiate your first charge
- Monitor the first full charging session to ensure everything works correctly
Congratulations! You now have a home EV charging station.
Cost Breakdown: What to Actually Expect
Let’s talk money. I’ve seen installation quotes ranging from $500 to $5,000+ for the same basic charger. Here’s why costs vary so dramatically and what you should budget for.
Equipment Costs
- Budget chargers: $300-$500 (basic functionality, reliable brands)
- Mid-range chargers: $500-$800 (smart features, better warranties)
- Premium chargers: $800-$1,200+ (advanced features, fastest charging, premium build quality)
Don’t automatically buy the cheapest option. A charger from a reputable manufacturer with good customer service and a solid warranty is worth the extra $100-200.
Professional Installation Costs
Simple installation (panel has space, charger location is near panel, no obstacles): $300-$800
Moderate installation (some conduit needed, slightly longer wire run): $800-$1,500
Complex installation (long wire runs, trenching required, panel upgrade needed): $1,500-$5,000+
Factors that increase cost:
- Distance from electrical panel to charger location
- Need to run conduit through finished spaces
- Requirement for trenching or underground wiring
- Panel upgrades or sub-panel installation
- Difficult access or challenging installation locations
- Local labor rates (urban areas typically cost more)
Get at least three quotes from licensed electricians. The cheapest isn’t always the best—look for detailed quotes that show exactly what’s included.
Permit and Inspection Fees
- Building permit: $50-$200
- Inspection fee: Usually included in permit, sometimes separate $50-100
These are non-negotiable in most areas and protect you by ensuring the work meets code.
Total Cost Examples
Best-case scenario:
- Charger: $450
- Installation: $500
- Permit: $75
- Total: ~$1,025
Average installation:
- Charger: $650
- Installation: $1,200
- Permit: $100
- Total: ~$1,950
Worst-case scenario:
- Charger: $700
- Panel upgrade: $2,500
- Complex installation: $2,000
- Permit/inspection: $150
- Total: ~$5,350
Most homeowners end up spending $1,500-$2,500 all-in for a quality Level 2 charger installation.
Available Rebates and Incentives
Here’s some better news: you probably won’t pay full price. Federal, state, and utility rebates can significantly reduce your costs.
Federal Tax Credit (2025)
The Inflation Reduction Act provides a federal tax credit of 30% of installation costs up to $1,000 for EV charger installations through 2032. This applies to both equipment and labor.
Example: If your total installation cost is $2,000, you can claim a $600 tax credit on your federal taxes.
Eligibility: Available to homeowners who install qualified EV charging equipment. Keep all receipts and your electrician’s invoice for tax filing.
State and Local Incentives
Many states offer additional rebates. As of 2025, generous programs include:
- California: Additional rebates through various utility programs, sometimes covering 50% of costs
- Colorado: Up to $1,300 in rebates for home charger installation
- New York: NYSERDA offers rebates up to $1,000 for Level 2 chargers
- Massachusetts: Up to $1,500 through MOR-EV program
Check the Database of State Incentives for Renewables & Efficiency (DSIRE) for current programs in your area.
Utility Company Rebates
This is where things get interesting. Many electric utilities offer substantial rebates for installing EV chargers because they want to encourage off-peak charging. Examples:
- Pacific Gas & Electric (PG&E): Up to $500 rebate
- Southern California Edison: Rebates vary by program, sometimes including free charger
- Austin Energy: Up to $1,200 rebate
- Duke Energy: Various programs with rebates up to $500
Some utilities even offer special EV electricity rates with significantly lower overnight pricing. Call your utility company—this is one of those rare times customer service actually has money to give you.
HOA and Workplace Programs
If you live in a condo or apartment:
- Some HOAs offer shared installation costs for EV infrastructure
- Many states have “right to charge” laws requiring HOAs to allow charger installation
For workplace charging:
- Federal tax credit covers up to 30% of commercial charging equipment costs (up to $100,000)
DIY vs. Professional Installation: Making the Right Choice
Can you install an EV charger yourself? Maybe. Should you? That depends on several factors.
When DIY Makes Sense
You’re a good DIY candidate if:
- You have previous electrical experience (have you installed 240V circuits before?)
- Your electrical panel has available space and capacity
- The charger location is close to your panel (short, simple wire run)
- You’re comfortable obtaining permits and scheduling inspections
- You’re installing a plug-in charger (simpler than hardwired)
- Local codes allow homeowner electrical work
Potential savings: $500-$1,500 in labor costs
Time investment: 4-8 hours for a straightforward installation
When to Hire a Professional
Call an electrician if:
- You’ve never worked with 240V circuits
- Your panel needs upgrading or is completely full
- You need to run wire through finished spaces or underground
- Local code requires licensed electrician for permits
- You’re uncomfortable working inside your electrical panel
- The installation involves complex conduit work
Why it’s worth it:
- Licensed electricians carry insurance (protects you if something goes wrong)
- They know local codes inside and out
- Work is typically guaranteed
- Faster installation with professional-grade results
- They handle permits and inspection scheduling
Here’s my honest take: Working inside your electrical panel is genuinely dangerous. One mistake can cause fires, electrical shock, or even death. If you have ANY hesitation about your skills or knowledge, spend the money on a professional. Your life and your home are worth more than the installation savings.
The Hybrid Approach
Some homeowners split the difference:
- Hire an electrician to install the circuit and outlet
- Mount and connect the charger yourself
This saves some money while ensuring the dangerous electrical work is done correctly. Just make sure your electrician knows this is the plan and pulls the appropriate permits.
Common Installation Mistakes to Avoid
Learn from others’ expensive errors:
Mistake 1: Buying the Wrong Charger
Not all chargers work with all cars (though most do). Before purchasing:
- Verify your EV’s maximum charging rate
- Confirm the connector type (J1772 is standard for non-Tesla; Tesla owners can use adapters)
- Check that the charger’s output matches your needs
Installing a 48-amp charger for a car that only accepts 32 amps wastes money. Conversely, a 16-amp charger for a long-range EV means frustratingly slow charging.
Mistake 2: Undersized Wire
Using wire that’s too thin for the amperage causes:
- Circuit breaker tripping
- Overheating (fire hazard)
- Voltage drop (slower charging than expected)
Correct wire sizing:
- 40-amp circuit: 8 AWG wire minimum
- 50-amp circuit: 6 AWG wire minimum
- 60-amp circuit: 4 AWG wire minimum
When in doubt, go one size larger. The extra cost is minimal compared to the safety margin.
Mistake 3: Ignoring Cord Length and Placement
That 20-foot charging cable seems long until you realize:
- Your charge port is on the opposite side of where you parked
- The cable doesn’t quite reach when you pull forward too far
- You’re stretching the cable across a walkway (tripping hazard)
Measure twice, install once. Actually park your car and walk through the charging process before finalizing charger placement.
Mistake 4: Skipping the Permit
“No one will know” is a terrible strategy because:
- Insurance may deny claims related to unpermitted work
- You’ll have to bring it up to code before selling your home
- It’s actually dangerous—inspections catch mistakes that could cause fires
- Fines can exceed the permit cost by 10x
Just get the permit. It’s not expensive, and it protects you.
Mistake 5: Not Planning for the Future
Think beyond today:
- Might you get a second EV? Consider installing conduit for a second charger now while you’re at it
- Could you move and want to take the charger? Choose plug-in over hardwired
- Do you want energy monitoring? Smart features? Buy a charger that supports your future needs
Adding features later costs more than including them from the start.
Maximizing Your Home Charging Setup
You’ve got the charger installed—now optimize the experience.
Smart Charging Strategies
Time-of-Use (TOU) Rates: Most utilities charge less for electricity during off-peak hours (typically 9 PM to 6 AM). Program your charger to only operate during these windows and save 30-50% on charging costs.
Scheduled Charging: Set your charger to complete charging just before you typically leave. This maximizes battery life by minimizing time at 100% charge and ensures your cabin preconditioning (heating/cooling) uses wall power instead of battery.
Energy Monitoring: Chargers with built-in energy monitoring show exactly what you’re spending on charging. Most people are pleasantly surprised—charging an EV typically costs $30-50 monthly for average driving.
Maintenance and Upkeep
EV chargers are refreshingly low-maintenance, but do:
- Monthly: Check cable for damage, ensure connections are tight
- Quarterly: Clean any dust or debris from ventilation ports
- Annually: Verify all mounting hardware remains secure, check for signs of overheating (discoloration around outlets)
Most quality chargers are rated for outdoor use and will last 10+ years with minimal attention.
Preparing for Extreme Weather
Cold climates:
- Batteries charge slower in extreme cold—this is normal
- Your charger will work fine in freezing temperatures
- Consider garage parking to improve cold-weather charging efficiency
Hot climates:
- Avoid direct sunlight on the charger if possible (reduces lifespan)
- Ensure adequate ventilation around the unit
- Some chargers throttle in extreme heat—this is a safety feature
Coastal areas:
- Look for chargers specifically rated for salt air environments
- Regular cleaning prevents corrosion
- Consider models with premium weatherproofing
Frequently Asked Questions
How long does a Level 2 charger take to fully charge an EV?
It depends on battery size and charger output, but typically 4-10 hours for a full charge. A 40-amp charger adds about 25-30 miles of range per hour, so a 300-mile range EV with a completely empty battery would take roughly 10-12 hours. In practice, you’re rarely charging from empty, so most overnight sessions easily top you off.
Can I install an EV charger if I rent?
Legally, it depends on your state’s “right to charge” laws and your lease agreement. Practically, you’ll need landlord permission. Some renters negotiate lease addendums allowing installation with the understanding that the charger stays when they move. Alternatively, stick with a Level 1 charger using a standard outlet, or seek out apartments with existing EV charging infrastructure.
Will an EV charger significantly increase my electricity bill?
Yes, but less than you’d spend on gas. The average American drives about 1,000 miles monthly. At 3 miles per kWh (typical EV efficiency) and $0.14 per kWh (national average), that’s about $47/month in electricity. Compare that to $150+ for gas in a typical car. Most EV owners report their electric bill increases $30-60 monthly.
Do I need a dedicated circuit for my EV charger?
Absolutely yes. EV chargers draw continuous high amperage, and the National Electrical Code requires a dedicated circuit—meaning no other devices or outlets share that circuit. This ensures safe operation and prevents overloading.
What happens if I move—can I take my charger with me?
If you installed a plug-in charger, absolutely! Just unplug it and take it along. For hardwired chargers, it’s more complicated—you’d need to disconnect it and potentially repair/patch the wall. Many people leave hardwired chargers when selling (they can be a selling point for EV owners) and buy a new one for their next home.
Looking Ahead: The Future of Home EV Charging
The EV charging landscape is evolving rapidly. Here’s what’s coming:
Bidirectional Charging (Vehicle-to-Home): Several 2025 models support using your EV battery to power your home during outages or peak rate times. This requires special bidirectional chargers, but the technology is becoming mainstream. Imagine your EV as a massive home battery backup.
Solar Integration: More homeowners are pairing rooftop solar with EV charging, essentially “fueling” their cars with sunshine. Smart chargers can prioritize solar-generated electricity, making your driving truly zero-emission.
Faster Home Charging: While 80-amp installations exist today, most home electrical services top out at 200 amps total. Future homes may be built with 300-400 amp service specifically to support multiple EVs and high-power charging.
Wireless Charging: Several companies are developing wireless home charging pads—park over the pad and charging begins automatically. While currently expensive and inefficient compared to plug-in chargers, expect this technology to improve.
The bottom line? Installing a charger now future-proofs your home and sets you up for the inevitable continued growth of electric vehicles.
Final Thoughts: Your Next Steps
Installing a home EV charger is one of the best upgrades you can make as an EV owner. The convenience of leaving home every morning with a full “tank” is genuinely life-changing—no more gas station stops, no more detouring to public chargers unless you’re on a road trip.
Here’s what to do next:
- Assess your electrical panel and determine available capacity
- Choose your charger based on your vehicle’s capabilities and your budget
- Get 3 quotes from licensed electricians in your area
- Research available rebates from federal, state, and utility sources
- Schedule installation during a time when you can be without charging for a day
- Plan for inspection and keep all documentation for tax credits
- Set up smart features to optimize charging costs and convenience
The upfront cost might seem significant, but spread over years of convenient, cheap home charging, it’s absolutely worth the investment. Most EV owners say their home charger installation ranks among the top decisions they made in their vehicle ownership journey.
Ready to take control of your EV charging experience? Start by calling a few electricians for quotes this week. Before you know it, you’ll be joining the millions of EV owners who plug in at home and never look back.