So you’ve made the leap to electric—or you’re about to—and now you’re wondering about home charging. Here’s the reality: installing a residential EV charger is one of the smartest investments you can make as an electric vehicle owner. It transforms your garage into a personal refueling station, and you’ll wake up every morning to a full battery without ever visiting a public charging station for your daily commute.
In this guide, I’ll walk you through everything you need to know about residential EV charger installation, from understanding your options to navigating costs, permits, and the actual installation process. Whether you’re a new EV owner or planning ahead for your first electric vehicle, you’ll finish this article knowing exactly how to set up home charging that works for your situation.
Understanding Your Home EV Charging Options
Before you start calling electricians, let’s clarify what you’re actually looking for. Not all home charging is created equal, and your needs will determine which setup makes the most sense.
Level 1 Charging: The Plug-and-Play Option
Every electric vehicle comes with a Level 1 charging cable that plugs into a standard 120-volt household outlet—the same one you use for your toaster. No installation required. Sounds perfect, right?
Here’s the catch: Level 1 charging is slow. We’re talking about 3-5 miles of range added per hour of charging. If you have a short commute (under 30 miles daily) and can charge overnight every night, this might actually work for you. Many Chevy Bolt owners with minimal driving needs stick with Level 1 for years without issue.
Level 1 is best for:
- Plug-in hybrids with smaller batteries (8-18 kWh)
- Light daily drivers (under 30 miles per day)
- People with access to workplace charging
- Those wanting to test EV ownership before investing in infrastructure
Level 2 Charging: The Home Standard
This is what most people mean when they talk about “installing a home EV charger.” Level 2 charging uses a 240-volt circuit—the same voltage that powers your electric dryer or oven—and it’s a game-changer.
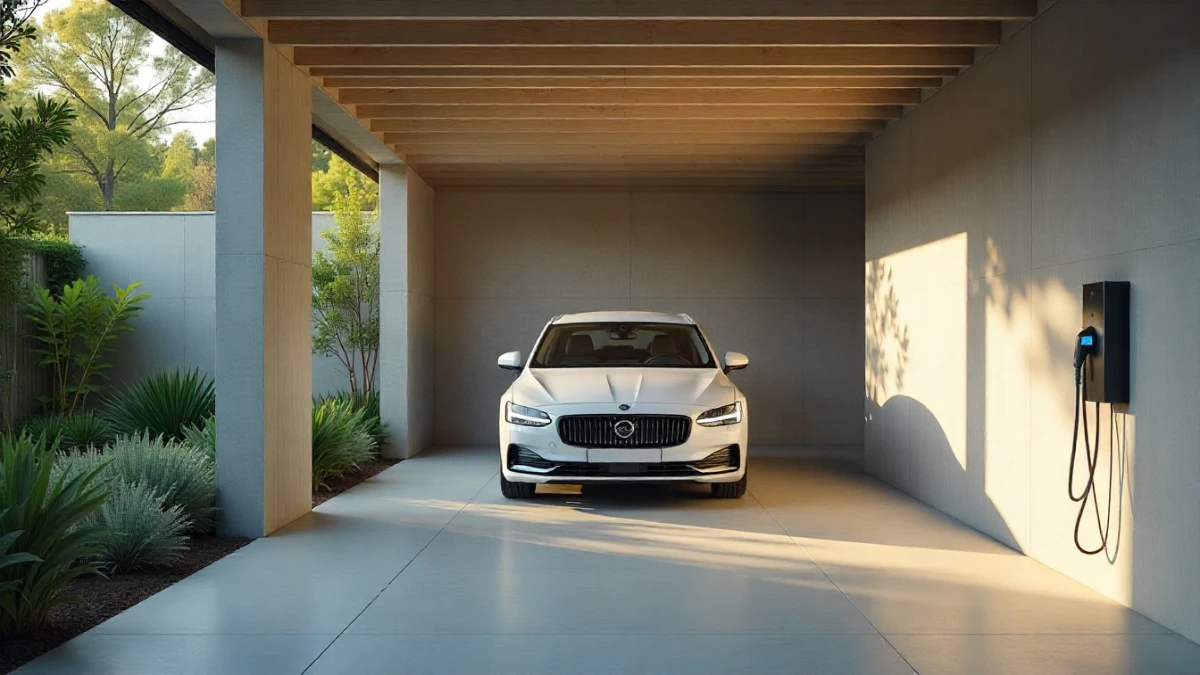
A typical Level 2 charger adds 25-30 miles of range per hour, meaning most EV batteries go from empty to full overnight. You’ll install a dedicated charging unit (often called an EVSE, or Electric Vehicle Supply Equipment) in your garage or driveway, hardwired to your electrical panel.
Level 2 is ideal for:
- Most EV owners with daily commutes of 40-100+ miles
- Vehicles with larger batteries (60+ kWh)
- Anyone who wants flexibility and faster charging
- Households with multiple EVs
The beauty of Level 2 is simple: plug in when you get home, and your car is ready every morning. No planning required.
How Much Does EV Charger Installation Actually Cost?
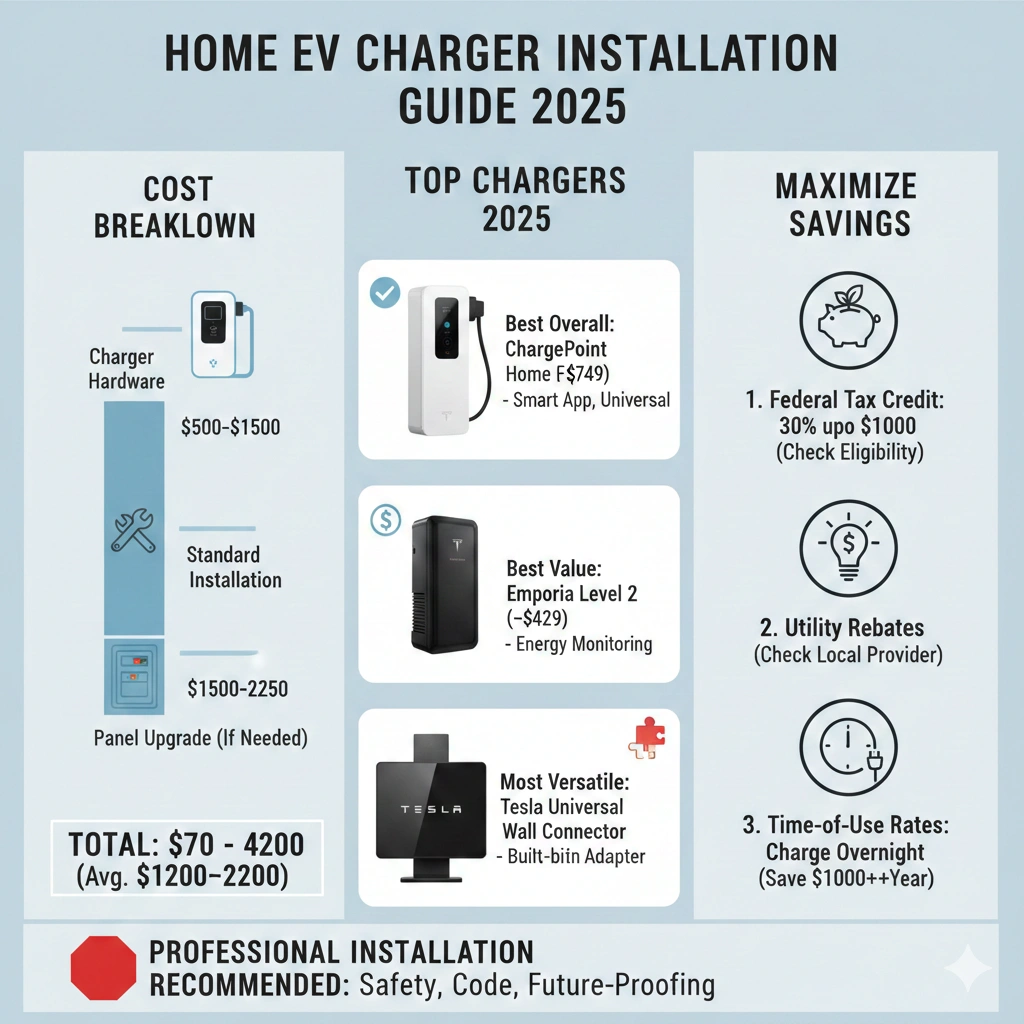
Let’s talk numbers, because this is probably one of your biggest questions. According to 2025 data from the Department of Energy and various installer surveys, here’s what you’re looking at:
Breaking Down the Costs
Charger Hardware: $400-$1,200
- Budget models (32-amp): $400-$600
- Mid-range models (40-48 amp with WiFi): $600-$900
- Premium models (smart features, longer cables): $900-$1,200
Popular reliable options include the ChargePoint Home Flex ($699), Grizzl-E Classic ($449), and Emporia Level 2 ($429). The Tesla Wall Connector runs $475, though it now works with all EVs using the appropriate adapter.
Electrical Installation: $300-$3,000
This is where costs vary wildly based on your specific situation:
- Simple install (charger within 20 feet of panel, no panel upgrade needed): $300-$800
- Moderate complexity (longer wire run, conduit required): $800-$1,500
- Complex install (panel upgrade, trenching, extensive conduit): $1,500-$3,000+
The biggest variable is whether you need an electrical panel upgrade. If your home has an older 100-amp or 150-amp panel that’s already near capacity, you might need to upgrade to a 200-amp panel. This alone can add $1,500-$3,000 to your project.
Total Investment: $700-$4,200
Most homeowners end up spending between $1,200-$2,000 for a complete Level 2 installation with a quality charger. That might sound like a lot, but consider this: if you drive 12,000 miles annually, you’ll save roughly $800-$1,200 per year on fuel costs compared to a gas vehicle (based on 2025 electricity vs. gasoline prices). Your installation pays for itself in about 1-2 years.
Available Incentives and Rebates
The good news? You probably won’t pay full price. As of 2025, several incentive programs can significantly reduce your costs:
Federal Tax Credit The Inflation Reduction Act’s Alternative Fuel Vehicle Refueling Property Credit offers 30% of installation costs, up to $1,000 for residential installations. You claim this when you file your taxes.
Utility Company Rebates Many utilities offer rebates ranging from $250-$1,000 for installing a Level 2 charger. Check with your local electric company—some even offer time-of-use rates that make overnight charging incredibly cheap (sometimes under $0.08/kWh during off-peak hours).
State and Local Programs States like California, Colorado, and Massachusetts offer additional rebates. Some municipalities provide extra incentives, especially in areas prioritizing EV adoption.
HOA and Multi-Unit Dwelling Programs If you live in a condo or townhome, specialized programs in many states help cover installation costs and navigate HOA approval processes.
Always check DSIRE and your utility’s website for current local incentives before starting your installation.
The Installation Process: What to Expect
Installing a home EV charger isn’t as complicated as it might seem, but it does require professional electrical work. Here’s exactly how the process unfolds:
Step 1: Site Assessment (Week 1)
First, you’ll need a site assessment. A licensed electrician will visit your home to evaluate:
- Electrical panel capacity – Do you have enough available amperage?
- Installation location – Where do you park and where can the charger go?
- Wire run distance – How far from the panel to the charger?
- Existing infrastructure – Is there existing conduit or easy wire routing?
- Permit requirements – What your local jurisdiction requires
During this visit, you’ll discuss charger placement. Most people install in their garage on the wall closest to where they park. If you don’t have a garage, weatherproof outdoor installations are completely viable—just make sure the charger has a NEMA 4 rating for outdoor use.
Pro tip: Think about cable reach. Most chargers come with 18-25 foot cables, but you want the charging port on your car to be within easy reach without stretching the cable taut. Consider whether you might charge multiple vehicles or if you’ll park on different sides of the garage.
Step 2: Permits and Planning (Week 1-2)
Yes, you almost certainly need a permit. This isn’t bureaucratic hassle—it’s safety. The permit ensures your installation meets National Electrical Code (NEC) requirements and your local amendments.
Your electrician typically handles permit applications, which cost between $50-$200 depending on your location. The application includes:
- Electrical load calculations
- Circuit design specifications
- Equipment specifications
- Site plans
Some jurisdictions offer expedited EV charger permits, recognizing them as priority clean energy infrastructure. Permit approval usually takes 1-3 weeks.
Step 3: Equipment Selection
While permits process, finalize your charger choice. Here’s what to consider:
Amperage: Most residential chargers are 32, 40, or 48 amps. Higher amperage means faster charging, but you need the electrical capacity to support it. A 40-amp charger typically provides about 9.6 kW of power, adding roughly 30-35 miles of range per hour for most EVs.
Smart Features: WiFi-enabled chargers let you monitor charging, schedule sessions during cheaper electricity hours, and track energy usage through an app. If your utility offers time-of-use rates, these features become very valuable.
Cable Length: Standard is 18 feet, but some offer up to 25 feet. Longer cables provide more flexibility but cost slightly more.
Hardwired vs. Plug-In: Hardwired chargers connect directly to your electrical panel and can support higher amperage. Plug-in models use a NEMA 14-50 outlet (like an RV outlet) and offer more portability but are typically limited to 40 amps.
Brand Reliability: Stick with established brands. The ChargePoint Home Flex, JuiceBox 40, Grizzl-E, Emporia, and Wallbox Pulsar Plus all have strong reliability records and good customer support.
Step 4: Installation Day (4-8 hours)
When installation day arrives, here’s what happens:
Morning: Electrical Work (3-6 hours) Your electrician will:
- Install a new dedicated circuit breaker in your electrical panel (typically 50-60 amp)
- Run appropriate gauge wire (usually 6 AWG or 8 AWG copper) from panel to charger location
- Install conduit if required by code or if wire runs are exposed
- Mount a junction box at the charger location
- Pull wire through conduit and make connections
If you need a panel upgrade, add several more hours—or even a full extra day—for this work.
Afternoon: Charger Installation (1-2 hours) Once electrical work is complete:
- Mount the charger to the wall (making sure it’s at a comfortable height, usually 48-54 inches to the center)
- Make final electrical connections
- Seal outdoor installations properly
- Test the circuit and charger functionality
- Configure any smart features and connect to WiFi
Inspection Most jurisdictions require a final inspection before you can legally use your charger. Your electrician schedules this, and an inspector verifies everything meets code. This usually happens within a few days of installation.
Step 5: Final Setup and Testing
Once you pass inspection, it’s time to charge! But first:
- Download the charger app (if applicable) and complete setup
- Configure charging schedules to take advantage of time-of-use rates
- Set charging limits if your vehicle allows (charging to 80% daily extends battery life)
- Test with your vehicle to ensure proper communication and charging
Most modern chargers are plug-and-play once installed—just plug in your car and charging begins automatically.
Choosing the Right Location for Your Charger
Location matters more than you might think. You want convenient, efficient charging that doesn’t create awkward logistics every time you park.
Garage Installations
If you have a garage, this is typically your best option. Consider:
Wall placement: Mount the charger on the wall closest to where your charging port is located. For most EVs, the port is on the driver’s side front or rear, though some (like Nissan LEAF) have it up front.
Height considerations: Install at a height that’s comfortable for you to reach and unplug. The general recommendation is 48-54 inches to the center of the unit, but adjust based on your height and mobility.
Cable management: Think about where the cable will hang when not in use. Some chargers include cable organizers or hooks to keep things tidy.
Future flexibility: If you might add a second EV, consider leaving space for another charger or installing one with dual outlets (though these are less common).
Outdoor Installations
No garage? No problem. Outdoor EV charger installations are completely standard, but you need:
Proper weatherproofing: Chargers rated NEMA 4 or NEMA 4X can handle rain, snow, and extreme temperatures. Most quality Level 2 chargers have this rating.
Covered mounting: While chargers are weatherproof, mounting under an eave or installing a small weather cover extends equipment life and makes charging more comfortable in bad weather.
Adequate lighting: Install near existing outdoor lighting or add a light so you can safely plug in after dark.
Security considerations: Outdoor chargers are generally secure, but in high-theft areas, consider models with locking connectors or install in a well-lit, visible location.
Driveway and Parking Pad Locations
If your electrical panel is on the opposite side of your house from where you park, you have options:
Conduit trenching: Wire can be run underground through conduit from your panel to your parking area. This adds cost ($8-$15 per linear foot) but provides a clean installation.
Exterior conduit: Surface-mounted conduit on exterior walls is more affordable but less aesthetically pleasing.
Detached garage subpanel: If you have a detached garage, you might need a subpanel installation, which requires professional planning to ensure adequate power delivery.
Common Installation Challenges and Solutions
Let’s address some real-world complications you might encounter:
Panel Capacity Issues
This is the most common obstacle. If your electrical panel is already loaded with your HVAC system, water heater, and other appliances, adding a 40-50 amp EV charging circuit might exceed your panel’s capacity.
Solutions:
- Load management devices: Smart panels or load-sharing devices can automatically balance loads, allowing EV charging without exceeding capacity
- Panel upgrade: Upgrading from 100-amp or 150-amp to 200-amp service costs $1,500-$3,000 but solves the problem permanently and adds home value
- Lower-amp charger: Installing a 32-amp instead of 48-amp charger reduces demand, though charging is proportionally slower
Condo and Townhome Installations
Shared housing presents unique challenges. You’ll need:
HOA approval: Start here. Some HOAs have streamlined processes for EV charger installations; others require board meetings and votes. The good news: many states now have “right to charge” laws limiting HOA restrictions.
Assigned parking: You’ll need a dedicated parking space where you can install equipment.
Electrical access: Determine whether you have access to your own meter or if installation requires coordination with building management.
Cost allocation: In some cases, you’ll need a separate meter for charging to ensure accurate billing.
Many condo owners successfully install chargers—it just requires more coordination upfront.
Long Wire Runs
If your parking area is far from your electrical panel, costs increase with distance:
- Under 50 feet: Usually manageable without major cost increases
- 50-100 feet: Expect to pay $500-$1,000 extra for additional wire and conduit
- Over 100 feet: You might need larger gauge wire to minimize voltage drop, plus significant trenching or conduit work
In extreme cases, installing a subpanel closer to the charging location can be more cost-effective than an extremely long wire run.
Older Home Wiring
Homes built before 1980 sometimes have aluminum wiring or insufficient grounding. These situations require extra attention:
- Aluminum wiring may need special connectors or partial rewiring
- Ungrounded panels require upgrading for safety
- Knob-and-tube wiring systems need replacement in affected areas
A qualified electrician will identify these issues during the site assessment.
Selecting the Right Charger: A Practical Comparison
With dozens of residential EV chargers on the market, how do you choose? Here’s a comparison of well-regarded models available in 2025:
| Charger Model | Price | Max Output | Cable Length | Smart Features | Best For |
|---|---|---|---|---|---|
| ChargePoint Home Flex | $699 | 50 amps | 23 ft | WiFi, app, scheduling | Tech-savvy users wanting full control |
| Grizzl-E Classic | $449 | 40 amps | 24 ft | None (basic model) | Budget-conscious, reliability-focused |
| Emporia Level 2 | $429 | 48 amps | 25 ft | WiFi, energy monitoring | Energy tracking enthusiasts |
| Wallbox Pulsar Plus | $649 | 48 amps | 25 ft | WiFi, app, scheduling | Modern design preference |
| JuiceBox 40 | $589 | 40 amps | 25 ft | WiFi, app, voice control | Smart home integration |
| Tesla Wall Connector | $475 | 48 amps | 24 ft | WiFi (Tesla app) | Tesla owners (works with others) |
| Autel MaxiCharger | $549 | 50 amps | 25 ft | WiFi, dual voltage | Flexibility for travel |
My take: For most people, the ChargePoint Home Flex or Grizzl-E Classic represent the sweet spot. The ChargePoint offers excellent smart features if you want app control and scheduling. The Grizzl-E is incredibly reliable and simple if you just want to plug in and charge without fuss. Both have proven themselves with hundreds of thousands of installations.
Maximizing Your Home Charging Setup
Once your charger is installed, optimize it for efficiency and savings:
Take Advantage of Time-of-Use Rates
Many utilities offer significantly cheaper electricity during off-peak hours (typically 11 PM – 7 AM). If your utility offers this:
- Switch to a time-of-use rate plan – Savings typically outweigh any daytime cost increases
- Schedule charging through your charger or vehicle – Set charging to begin at the start of off-peak hours
- Monitor your savings – Most smart chargers track this; you might save $30-50 per month
For example, Southern California Edison’s TOU-D-PRIME rate offers electricity at just $0.14/kWh overnight versus $0.42/kWh during peak hours—a 67% discount.
Smart Charging Strategies
Charge to 80% daily: Unless you need maximum range for a specific trip, charging to 80% rather than 100% significantly extends battery life. Most EVs let you set this default limit.
Use charging schedules: Rather than charging immediately when plugged in, schedule charging to start during cheapest electricity hours.
Monitor energy usage: Smart chargers show exactly how much energy you’re using and what it costs. This data helps optimize your charging habits.
Maintenance and Care
Level 2 chargers are remarkably low-maintenance, but:
- Keep the connector clean – Wipe down the plug occasionally to prevent corrosion
- Inspect the cable – Check for damage, especially where it exits the unit
- Clear snow and ice – Don’t let snow build up on outdoor units
- Update firmware – Smart chargers periodically release updates for performance and security
Most chargers are designed for 10+ years of maintenance-free operation.
Preparing for Future EV Ownership
Even if you’re just planning for your first EV, thinking ahead saves money and hassle:
Future-Proofing Your Installation
Consider installing:
Higher amperage capacity than you currently need: If you’re getting a 40-amp charger but your panel can support 60 amps, have your electrician run wire sized for 60 amps. Upgrading the charger later is easy; upgrading the wiring is expensive.
Conduit for a second circuit: Planning to add a second EV in a few years? Running a second conduit during initial installation costs maybe $200 extra now versus $1,000+ later.
Panel space: If upgrading your electrical panel, leave spare breaker slots for future EV charging circuits or other electrical upgrades.
The Solar Connection
If you have solar panels or are considering them, home EV charging becomes even more attractive. A typical rooftop solar system generates 25-35 kWh per day—enough to cover most EV charging needs plus household usage. Some smart chargers can prioritize solar charging, maximizing your clean energy usage and minimizing grid electricity.
The math is compelling: solar-charged EV miles cost essentially nothing beyond your initial solar installation investment, dropping your per-mile “fuel” cost to nearly zero.
Making Your Decision: Is Home Charging Right for You?
For most EV owners, installing a Level 2 home charger is absolutely worth it. The convenience factor alone—never visiting a gas station or public charger for daily driving—justifies the investment.
Home charging makes the most sense if you:
- Own your home (or have landlord/HOA approval)
- Have dedicated parking with electrical access
- Drive regularly enough to warrant the investment
- Plan to keep your EV for several years
- Want the convenience of overnight charging
You might skip home charging if you:
- Rent short-term or move frequently
- Have a plug-in hybrid with minimal electric range
- Have excellent workplace or public charging access
- Drive very infrequently
- Have a Level 1 setup that genuinely meets your needs
Your Next Steps
Ready to move forward? Here’s your action plan:
- Check for incentives – Visit DSIRE.org and your utility website to identify available rebates
- Get multiple quotes – Contact 2-3 licensed electricians who specialize in EV charger installation
- Research charger models – Read reviews and compare features for chargers in your budget
- Schedule site assessments – Most electricians offer free assessments
- Verify permit requirements – Understand what your local jurisdiction requires
- Plan your timeline – Factor in permit approval time (typically 1-3 weeks)
The entire process from first call to charging your car typically takes 3-6 weeks, though straightforward installations in permit-friendly jurisdictions can happen faster.
Installing a residential EV charger represents a shift in how you think about refueling. Instead of making dedicated trips to gas stations, your car simply charges while you sleep, work, or go about your life. The upfront investment pays for itself relatively quickly, and the convenience factor is something most EV owners say they can’t imagine living without.
The EV charging landscape has matured significantly. Equipment is reliable, installers are experienced, and incentives help offset costs. There’s never been a better time to set up home charging—and as electric vehicles become increasingly mainstream, having that infrastructure already in place adds real value to your home.
Take the first step: contact a qualified electrician for a site assessment. You’ll have a concrete understanding of what your specific installation will cost and require, putting you on the path to convenient, affordable home charging.